Sunday, October 05, 2008

It fits! (A sewing post)

Here's my latest F.O., an Elizabethan corset to go under the gown I will be making in the next few weeks.
Front:
Side:
and Back:
This is a reasonably comfortable corset; I could walk around, sit down, and consume fluids while wearing it unlike a commercial monstrosity I had purchased many years ago to go under a formal gown. I also think it looks quite cute. My husband was disappointed that I didn't make it out of a fashionable fabric in order to be able to wear it as outerwear instead of underwear.
Since it fits so nicely there's always the possibility to use the master pattern as a bodice in the future. Also, I achieved 2 inches of compression at the bust with minimal compression at the waist giving my body the conical shape typical of the Elizabethan era. Some cleavage is present as shown in the side view, but that will all be covered up by the chemise I will be wearing underneath. Now for the details:

Pattern: the Custom Corset Pattern Generator
Notes: The pattern needed no modification as it's custom built for my funny wide-waisted and short-torsoed self. I did a few mockups fiddling with the built-in 2 inches of compression (I didn't trust that my body could do that) and went with the original specifications generated by the pattern for my dimensions. I did have to cut the armscye deeper though.
The only bits that I found less detailed was the discussion on strap placement; in a separate document about how to sew your custom corset they said if you want straps to place them 3 inches away from the center back and front (and 1 inch wide) and to cut them 5 inches long, and join at the shoulder. I found that this did not give me the optimal support and pulled the corset up too high. Maybe I have huge shoulders. Instead at the mockup/muslin stage I cut long strips 1.5 inches wide and pinned at the center back 3 inches away from the center back at a 90 degree angle to the corset edge. Then I took the other end and moved it around until I got the fit I wanted and marked the spot. Since I thought that cutting 13 inch straps coming out of the back was wasteful of the fabric I cut out 3-inch extensions at the right place and joined in 10 inch long pieces of fabric (not including seam allowance) cut on the grain to finish the straps. Supposedly bias-cutting the straps gives a more snug fit over the shoulders but stretches over time. Then I placed grommet holes at the end of the straps and at the place for the join on the front to have yet more flexibility in fitting. I will tie them on with elastic once I buy some in order to get the smoothest transition from strap to corset.

The boning pattern was also left more-or less up to me. On one place on the site 'they' say that if you use rigilene, to use a fan-shaped boning pattern. (Huh?) On the boned-tab option page 'they' say to bone heavily if you use rigilene. I went with the bone-as-heavily-as-you-can-given-the-quantity-of-rigilene-you-have method and I think it worked out well. Only time will tell.

Materials:
150-cm wide cotton canvas. In the US it's cheap (under $5 a yard I hear) so it's commonly used for this sort of thing. Here it's not cheap. It's about $15 a meter. Oh well, it works. Unfortunately I later found out surfing eBay that I could have gotten linen canvas for less than half the price per meter. Linen canvas would have been better because it wicks away moisture. Oh well, if I ever do this again (please no!) I'll know where to look for better materials. I finished the edges with 2 packages of 5-m long and 2 cm wide (with the edges folded under) white cotton bias tape. No problems there. But if anyone is interested in making their own, there is a nice set of instructions provided by the Dread Pirate Roberts for making continuous bias tape.

My final thoughts on this project:
Biding the corset was a BIG ROYAL pain in the b*tt.
I think I could have gotten away with cutting it an additional 0.5-1 inch narrower. I can easily adjust it if I gain some weight but not if I lose weight. If I'm a bit narrower at Christmas things are going to be tricky.
Setting grommets hurts your hands if you don't have a lot of hand strength. My husband set a bunch of them because I got hand cramps. At least he insisted that I purchase the grommet setting thingie (sort of looks like pliers) even though it was a bit expensive (about $30). Thanks Boo!

Now I'm working on the next garment, the chemise that goes under the corset. I won't show pictures because it doesn't really look like anything yet. I wanted to make a high-necked shirt
because I think it would look better than a wench-style low gathered shirt under a high necked bodice and I don't feel like making a partlet. I'm using a lightweight semi-transparent cotton lawn fabric that wrinkles when you look at it the wrong way and frays like crazy. I found a free downloadable pattern for exactly the look I want, but I'll have to hunt around to share the link.
These screen-shots of the movie Elizabeth The Virgin Queen show exactly what I am making:

This scene is from the end of the movie where Elizabeth gets her hair cut off. Her three ladies-in-waiting have high collared shirts with what looks to me like a cartridge-pleated neck ruffles. I'll bet these shirts are a lightweight transparent silk but that's a bit expensive for a garment that I haven't worked out all the details for yet. I already made one major mistake, thank goodness for extra yardage!

Ivanova

Saturday, September 27, 2008

Who is this thing supposed to fit, anyways??? (A sewing post...)

In my last post, I mentioned that I was interested in sewing the positively drool-worthy dress featured as a Masterclass on Your Wardobe Unlock'd. Pictures can be found here...
Before ordering any fabric, I purchased the recommended bodice pattern, Reconstructing History's 1670s-1690s bodiced gown. I followed all the recommended steps starting from the beginning, which was to cut out a pattern piece for the largest of your relevant body measurements from the sizing table. Since that was my waist/hip area, I cut out a size that *should* fit a 38 inch bust, with a supposed 2-inch gap for the lacing. So that means that the garment size is 36 inches across the bust (my bust measurement), right? More on that later.

The first step was to cut the pattern out of cardboard/bristol board to check the fit while imitating the stiffness of the boning, so if it stabs you anywhere (like at the hips or armpit) you can cut those bits away and then transfer those alterations back to the pattern paper. Useful tip! The cardboard fitting went without a hitch, so I made a "muslin" out of some fabric scraps I had around the house, which is the same fabric I intended to use for the main part of the gown but in a different color. I figured this step would help me see how the bodice would look in my fabric choice, and work out if the taffeta would stretch when laced up, etc. Also note that the pattern as written is meant to lace up the back where a 2-inch gap is somewhat acceptable. The YWU instructions just say to switch the lacing from the back to the front with addition and removal of the appropriate seam allowances. Also note that the pattern is for a tabbed corset, but YWU removed them. YWU drafted the bodice from a book (by Janet Arnold, historical costumer extraordinaire, I don't remember the title of the book) but recommended using this pattern due to similarities in style. Here's my fitting of the bodice.
Aaargh !!! No matter how hard I tugged or laced it up tightly, it was WAY too small everywhere but the upper back where it gaped like crazy. With my husband's help I managed to get the thing closed but it wasn't pretty. Really not pretty. I couldn't breathe. If it was boned I'm sure I'd have broken a rib or two. Who is this thing supposed to fit anyways? It's a size larger than my bust and it's *supposed* to have a 1-2" gap (for someone with a 38-inch bust) so why is there a good 3 inches of gap at the chest?

So I gave up on this pattern. Good thing I didn't cut out the pattern paper, instead I traced over the pattern with giant tracing paper and cut that out instead. Anyone want to buy an uncut but opened pattern for a bodice that probably won't fit anyone? For fun I wandered over to www.elizabethancostume.net and fiddled with their custom corset pattern generator. I also googled like crazy the topic of fitting bodices and corsets. Here's what I learned...
1. For a back lacing Elizabethan corset, about 2" of gap is required in order to get the right amount of smoosh at the bosom.
2. For front lacing corsets, and especially bodices, at most a 1/2 " gap is OK, otherwise it just looks bad.
3. To have the maximum amount of flexibility in sizing and ease of dressing, a front and back lacing corset cut with 2" of negative ease is the best bet. That way if you get a *touch* bigger it can still accomodate an extra 1/2" gap at the front.
4. No one in internet land has used this particular Reconstructing History pattern. Hmmm....

I made a few mockups of custom-generated corsets from the elizabethan costume site and they all worked, but the one cut with tabs and a 2" gap gave the best fit. Here's a comparison of the custom corset in navy blue over the Big Disaster Bodice.

The picture isn't great, but the differences are that:
1. The custom corset (CC) sits lower. I think the straps were too short on the Big Disaster Bodice (BDB). I figured out where the straps should be and their length on the CC by pinning long strips of 1.5" wide fabric from the recommended placement point on the back (described at the elizabethan costuming website above) to where they felt right at the front. My shoulder straps were 3" longer than the recommended length. I must have enormous shoulders!
2. The back is cut at an angle.
3. It's about 1" wider at the bust and 2" wider at the waist than the BDB.

So last weekend I decided that I had two options. I could fiddle with the BDB until the measurements between the two agree. But they are corsets from different periods and it would be a lot of work for someone who has never done this sort of thing before. Or I could just make an Elizabethan gown and separate corset. The final corset mockup fit extremely well, so that's what I decided upon. I also refuse to go through a lot of effort for a 1-wear-only dress, so I figure I'll get even more use out of a Renaissance-style gown than a Jacobean one. So my mind was made up.
This is the gown I'm attempting to make. My apologies for my lack of drawing skills.It's a high-necked bodice (which I'll draft myself) with an over and underskirt (using the same instructions as would have been used for the pirate gown) with a high-necked chemise and a corset. This picture approximates my color scheme. I'll be using purple silk taffeta I bought off ebay (for an unbelievably good price from Thailand) for the underskirt, bodice and sleeve lining. The bodice and overskirt will use a black silk-rayon blend taffeta purchased from a competitor of the ebay vendor who never got back to me. Shame shame.

Sidenote: Mom, I know you don't like the idea of black wearing black to a wedding. Thrace thinks it's OK, and it's elegant. The other colors were also way too bright. And somewhat ugly. I consulted with friends.

I recently acquired some beautiful white cotton lawn for the chemise, I'll probably get to start that next weekend. Now my only decision left is the lining fabric for the skirts. They will be quite full (3-4 yards wide at the lower hem) so I don't want a heavy lining. Silk habotai is way out of my price range for the quantities required. Polyester is affordable (1.25 pounds/meter), lightweight, and apparently won't cause static cling between the layers. But it doesn't breathe and Thrace said (and I quote) "yuck". The polyester lining fabric I found on the internet is also a 45-inch width fabric while the black taffeta is 59" wide, so I'll have to piece the lining together for the skirts. I say "yuck" to that. I hunted around for ideas for natural fabric linings, and came across a costumer here who claims to only use cotton muslin as a lining fabric. I found the price quite reasonable from an online vendor at 1.89 pounds/meter for a 54" wide black muslin. And it's wider than their polyester lining, definitely a bonus. My only concern is that it will get all static-clingy. Advice needed! Will the weight of the skirts overcome the static charging and sticking of the muslin to pantyhose/taffeta underneath? Will it charge at all? Help!

At least I have a bit of time to make up my mind on this one because I'm still working on the corset.
I used a locally purchased cotton canvas material for the corset, in a so-called natural color. Well then why did it bleed yellow (bright urine yellow - yum!) when I pre-washed it? I'm so glad I washed it, the last thing I want is for that yucky yellow to bleed all over the pure white chemise I'll be making next. It is extremely easy to sew, at least. I sewed in about 32 boning channels on each half and used about 18 meters of rigilene boning. I would have preferred to use plastic cable ties for the boning because it's supposedly strong and flexible like the baleen used in period, but I couldn't find long enough cable ties locally. They do come in 50 cm lengths,
but I'd have had to mail-order it and I had the rigilene handy. I am finishing up binding the corset with bias tape by hand. Ouch! Never again. Hopefully I'll be done next weekend so I can post some pictures.

Ivanova

Sunday, September 07, 2008

Warning: Viewer discretion advised

Mom: this means you. There is one rude (but funny) photo below. Skip this post if you are easily offended. Otherwise read on. So... as Thrace has posted on more than one occasion, whe likes to go camping on the weekends. Well, I like to dress up funny and also go visit medieval cathedrals. I've been doing both those things in the last month, hence the lack of posts. I went to Cologne and saw the enormous cathedral (which was only finished in the 19th century due to lack of funds) which I believe is the highest standing Christian monument in the world, and then I say Notre-Dame de Strasbourg which was the highest standing cathedral until Cologne's cathedral was finished. Wow. Impressive architecture. I love Gothic architecture.

This is the view up a stairwell of the Cathedral builder's offices of the Strasbourg cathedral, which is now a museum. The level of detail in the buildings is astonishing, each time you look you see something new.
The city had illuminations of the cathedral at night, and the view was fantastic. This is definitely worth checking out next August if any of you lovely blog readers are in the area next August.

In our wanderings of the city, me and my friend also saw some amusing contemporary art:
Take that you lawn-gnome thieves! I can't help it, I want one. Too bad I have no lawn.

So I promised details about that sweater I posted about briefly last time.
Well, it's done! Just in time for the chilly weather too.
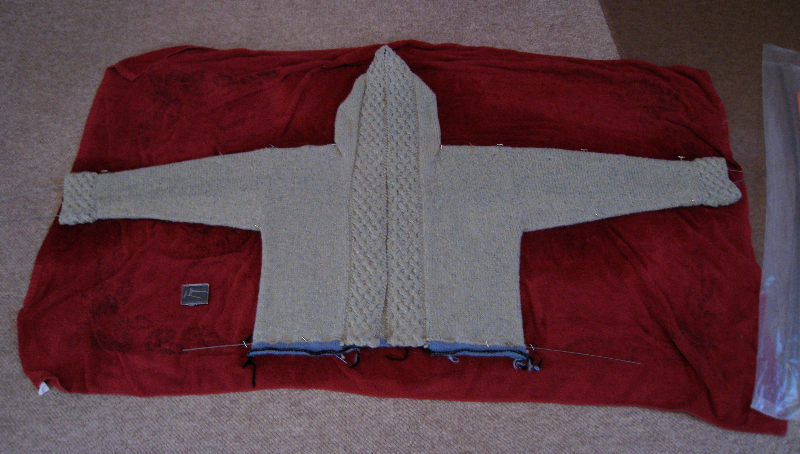
Pattern: Kaleidoscope by Sarah Sutherland
ravelry link
This sweater was formerly available from Magknits, now it is available at the designer's blog as a free pdf download.

General idea:
It's a bottom up raglan that is entirely seamless, knit in fingering weight yarn on big (pattern states 4.5 mm, I used 5 mm) needles.

My thoughts:
I love it. It was a much faster knit then I thought a fingering weight sweater could be. And the construction method made it possible for me to try it on as I went along. This really helped me to nail the sleeve length perfectly, which is usually an area I have difficulty with.

Modifications:
I extended the k2 p2 rib at the sleeves and neckline to be 1 inch long (6 rows of ribbing at my row gauge). I'm not really sure what size I ended up with because I am using a thinner yarn knit on bigger needles than the pattern states, but unblocked it fits me very nicely. I'll do a proper measurment and modelled shot once I block it. I worked the number of stitches for the 40 inch bust size, and I know it's smaller than that. I also worked more yoke decreases (10 decrease rows, or 20 rows total) than the pattern stated because I wanted a higher neckline. I also made full-length sleeves instead of 3/4 length. It was easy, I just kept on knitting and trying the sweater on until it was my full sleeve length.

The yarn:
21st century yarns botany wool in colorways Pluto (bottom hem), Sorcery (middle section) and Mole (neckline).

My impressions:
Nice wool. No complaints whatsoever. Beautiful colors. I would definitely buy again for a fingering weight hand-dyed shawl. Gorgeous colorways from their inline color card. It's a bit fuzzy and 'sticky' so it way work well for stranded colorwork too. I don't know yet because I never tried it!


Future projects? Well, thrace is getting married in a few months. I searched long and hard for a dress to wear (I only own one dress and I can barely breathe when I wear it, and it's too casual for a winter wedding anyway) and I failed miserably. Nothing would fit either me or my friend who is roughly the same size but with a different shape. Who are these dresses made for anyways? Clearly not humans when I can't even get my arm in the sleeve because the armscye depth is too small!!! So it looks like I'm going to have to sew something. I've settled on a gown which is sort of Victorian-ish, but without the cased steel boned corset. Shudder. Here's a picture of the completed gown on the designer's website. I have settled on a black mostly-fake-silk taffeta as the main fabric and a gold jacquard fabric for the contrast fabric. Thrace still has to approve this choice (hint hint call me!) but I'm looking forward to trying this out. And I cast on for a black lace shawl to match. If I go ahead with it, I'll post progress updates on it. For those of you who are interested the gown instructions are a 3-part masterclass from the online sewing magazine Your Wardrobe Unlock'd.

Ivanova

Ivanova

Sunday, August 10, 2008

Dragging my feet


It really does take me forever to finish an adult-sized sweater. I started Arwen in September 2007. Machine knitting the stockinette parts on the LK-150 (tension dial set to 6.5) went quickly enough. Unfortunately, the sleeves turned out too narrow to be comfortable with a long-sleeved shirt under the sweater. Since I had planned the sweater as an outdoor jacket, this wasn't going to be acceptable.

Over the winter, I fixed the sleeves in fits (unpicked cast-on and bind-off edges) and starts (added additional short rows to widen the sleeves). I've been pushing to finish this in time for fall; I even took the final cable panel on our backpack in the Uintas last weekend. Knitting by a pristine alpine lake is an experience.


I think it finally turned out well: I really like McTaggart Tweed for rugged, warm sweaters. I'll post modeling photos once it's dry and I stitch up the hems.

Sunday, July 27, 2008

Wow, no posts for a month!


Well, that's what happens when you're busy and then running around on the weekends! First Thrace came by and it was very nice to see her. And her knitting which she is not posting about regularly! Hellooo blog collaborators! Then a handful and a half of the inlaws came by and we wandered around the countryside in a rented car looking at the castles in the area. Very nice!
This one is Burg Hanstein which was built in the 14th century, if I am understanding the German handouts correctly. I posted pictures of this castle last August when there was a medieval festival; it looks much bigger when it's not being swarmed by hundreds of people!

My husband and I have also been attending medieval festivals in the region; I've been filling my free time with sewing seasonal appropriate gear. The problem is that it's chilly and wet most of the summer, but not cold enough for an enormous cloak. I bought an end of roll 2.5 yard piece of leightweight wool for a throw/wrap cheap... Here I am all wrapped up, posing with one of my husband's colleagues who also attends these things (on the left). I wish I had a spear!
While it's nice and warm, I found that it was tricky to wear as it slides around a fair bit, so I hacked it up into a super-tunic...
Mmmmm... nice and fitted except when I'm not standing straight! I took schematics from a web page entitled 'T-tunic the period way' and omitted the center gore. I did this because I can not sew it in nicely (as I discovered while making the cheapo mock-up which will NEVER see the light of day) and medieval Anglo-Saxons apparently did not use them. I instead transferred the fabric to make wider side gores than shown in the schematic (much easier to sew!) because I still need the extra room at the hips. I intend to dress it up a bit in the near future by adding silk trim at the neckline, sleeves and hem. Another modification I made was to cut the front and back into two pieces because I figured the garment needed a seam there to hang properly. I also cut the shoulders on a slope to omit the bagginess at the shoulder line that really bugged me on the mock-up. To make the neckline (and to find out how much material to remove at the shoulders) I made a pattern by tracing over an old Gap V-necked T-shirt I bought ages ago. I slipped the t-shirt over the under-dress to make sure that
the sizing and neckline would work, and I was happy with it. I also had to alter the schematics as shown because here the fabric (pre-shrunk) is 58 inches wide and not 60! So much for standards!

A few more words on this matter... when I was planning and drafting, I was a bit concerned that NO ONE posted pictures of their finished T-tunic using these guidelines even though plenty of web-pages refer to it. That really makes you wonder if it will turn out well. Even the designer (who I think is very clever for drafting this pattern in such a way that it uses fabric in a non-wasteful way to get a very sweet and period-looking result for a gown shape that was used for at least a couple of hundred years in Europe with only minor modifications) doesn't show a clear picture of the finished product, only a couple of inches of hemline under an over-gown. Shame shame! So here you go world. A picture. If anyone cares, post a comment and I'll arrange for a full length photo to be taken. I am very pleased with how it turned out and I got loads of compliments on it. Not bad for a quick easy sew (once I did the learning part on the mock-up. Still, straight lines = easy sewing).
My silk gown has also been getting a fair amount of wear too. Your friends are much more likely to get dressed up with you if you have a spare dress. She's (more than a touch) narrower so I am lending her the narrower cut gown. She also got loads of compliments. It's nice what you can do with interior decor fabrics if you care to!

So... knitting.
Currently working on the Kaleidoscope cardigan, formerly from MagKnits, now posted on the designer's blog here. I'll describe it in more detail including where I found those lovely yarns once I'm done my current sewing WIP, the husband's tunic, cut along the same lines as mine!

Ivanova

Tuesday, July 08, 2008

Dodecahedron basket

Looking back at the blog's posts, I realized that I forgot to write about my stitch 'n bitch one-skein swap object from January. Since I'm not feeling terribly inspired in this heat, I thought I'd look back at this project.

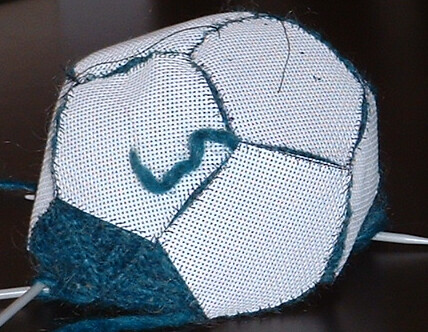
The basket had a number of sources of inspiration: I got the pentagon idea from Knitting Nature, from this project, and from this pattern. Essentially, it's the knit soccer ball with the 12th pentagon missing.


The basket was knit with Brown Sheep Lamb's Pride chunky and lined using some quilting cotton. I used Vinyl-Weave as interfacing. Fortunately, cutting the sheet into pentagons was fairly easy.


I've been sorting through our photos from our trip to Europe (we visited Germany, France and the Czech Republic). We had a fantastic time in Berlin.

charlottenburg palace grounds

The Charlottenburg Palace was one of the first sites we visited upon arriving in the city, which was worth seeing for the grounds alone.

Sunday, June 01, 2008

The baby pinwheel is (almost) done!

I went to Berlin a few weekends ago, and got lots of knitting done on the train. Even took the wrong one by accident (right platform, right time, wrong train? Guess it happens...) which increased the knitting time by 1/3. Ooops!

I went to many places, and even did some shopping. I love Berlin. I ate great food cheap, had some very nice wine at a Parisian-style wine bar in Kreuzberg, went to a goth bar which reminded me of the 'good-old-days' more than 10 years ago, and went to the very popular and famous Festival of Cultures.
There were loads and loads of people. It was so crowded that I couldn't feasibly sample any of the cultural wares or foods, so me and my friend left after only an hour. It was extremely hot and sunny so all that standing around and slowly inching forward was not very fun and made our feet hurt. And all of the sun/heat/crowding makes for grumpy children.
Very. Grumpy. Children.

All of that knitting made my hands hurt.
Ouch! I need to hurry it up because the kid is already born. It's a boy, so I'm somewhat glad I chose dark colors for this.
Overall the pattern (from Elann's website) was pretty easy, but the place where I added the sleeves has a discontinuity in the garter stitch pattern. I'll have to keep an eye on it when I make my full-sized version. I also decided I liked the picot bind-off better than bobbles, so I ripped back the pinwheel bind-off, extended the length of the sweater (it now has a radius of 15 inches instead of 12 inches) and made a 4-stitch picot bind-off following the instructions on Knitty's techniques pages, which I linked to in a previous post. Now I need to weave in 8 thousand ends. Yuck. I know now why I never do colorwork; I HATE weaving in ends! HATE HATE HATE! I'll have to do that this week, and send it off to it's new home!
Here's a gratuitous close-up of the bind-off edge.
Ivanova

Thursday, May 29, 2008

Still here

Still here, still knitting.


That's a Queen Anne's lace shawl I'm knitting on the train from Munich to Rothenburg ob der Tauber (cute town, very touristy).

I'll post more once I get home from vacation. The Blogger interface is a nightmare on my internet tablet.

Monday, May 12, 2008

Spring/summer fun

Medieval festival season has officially started for me with the early May festival at Freienfels. I snapped a few photos of stuff I saw. I had a pretty good time and saw several historically accurate fabric stands with nice stuff, but I had to travel light, so not much browsing occurred.
I also saw some handmade drop-spindle vendors, as well as fleece and yarn boots selling fibers that were dyed using historical techniques and materials. Nice stuff, but again, I had to travel light because my husband and I were carting around sleeping bags and a tent on the train, and I have to make a concerted effort to reduce the stash.

The festival took place in a field near an old castle. We took the rocky winding path up to the castle and saw some dancers. What a hike! No one in their right mind would attack that place. Or maybe they would have to be much tougher than me!
Ignore the smudgy ghosts, there is a law here about not photographing children and I only just noticed they were in the way. Parents take note: don't bring your children to places where people will be taking a lot of pictures. Just leave them at home please! Thank you.

There were also jousting competitions...
It ended pretty quickly because one guy got hit so hard he went flying off his horse. It's still a
dangerous hobby and it's better to be safe than sorry.
I also saw some gorgeous garments, and while they are not quite historically accurate, they were simply stunning. One badly photographed example...
Stupid long exposure time! I saw her go by and snapped, but I had my camera settings ready for a different shot. The basic idea: a calf length coat with princess seams made of crushed (!) velvet. It has a liripipe (read: long and pointy) hood that goes to the waist lined in a contrast color crushed velvet. There is a tightening string/ribbon which thread through loops sewn to the back princess seams and the string/ribbon is the same color as the hood lining. I haven't seen the front so I have no idea how it fastens. Probably buttons to the hip, I figure. Gorgeous! And it pointy bell-shaped sleeves.

My outfit: not so stunning but very warm.
It was quite cold with the nights dipping down to 5 or 6 degrees (Celsius). The wool cloak was good for keeping warm while walking around and it made an EXCELLENT extra blanket to throw over the sleeping bags. That's what people did with them in the middle ages, and it works incredibly well for it. It also made me appreciate how warm wool really is. For something like this, accept no substitutes!

I recently finished a sweater that I'll post about soon, and I've been working more on Imogen recently, to minimize the sweater-quantities-of-aran-wool portion of the stash.
So far I've finished the back and one sleeve, using Lorna's Laces Bullfrogs and Butterflies. This yarn is a luxury to knit with, a fuzzy (i.e. contains mohair) single ply that just glides on the needles. To avoid pooling I swap balls every 2 rows. And the lengths of some of the colors is not the same in every hank, so this minimizes the differences between hanks when knitted up. It looks very long and narrow, so I am hoping that I have enough yarn, and it will get shorter and wider when blocked!

Ivanovaknits

Sunday, April 13, 2008

Almost Ready...

Between work, the internet outages and sewing, there hasn't been much blogging, knitting, or blogging about knitting going on at my place. Instead I'll discuss on my latest sewing WIP, which I expect to finish sometime this week.


This is my cloak for the medieval festivals I expect to attend in the spring/summer/autumn.
There's LOTS of them in Germany in general, and many of them within an hour and a half's train ride from where I'm living. I suspect this is due to the large number of well-preserved medieval castles in the Lower-Saxony and Hesse region. So my husband and I can buy a relatively inexpensive one day regional train ticket, go away and come back all on a Saturday! Sweet! I also think a cloak is necessady because of the variability of the weather here. Last year May was sunny and hot, but July was cold and wet. You never know, so I figure I'll be prepared just in case.

Now for the details...
The pattern... Simplicity 5794. This pattern gives 3 options, where view A (click on the view link) looks sort of Victorian, view B (the one I made) looks more Renaissance/Medieval because of the long pointy hood, and view C looks like an ordinary cloak. As much as these things can be considered ordinary these days!

My opinion so far? It certainly looks the part, but good fabric choices help. I will get to that in a minute. I am not a fan of the hood, even though it looks great in principle, it is difficult to wear.
It's very full at around my face and due to the weight of the material it flops off very easily.
The only way the hood would look good worn is to have it perfectly arranged in a mirror and stand extremely still so it doesn't fall off. I would only wear it up if it were raining, and no one looks good sopping wet! I also find it flops about when it's hanging down due to that fullness around the face. Not perfect but I can live with it. Others have this issue also as can be seen
here.

I also find that the pattern leaves something to be desired in the finishing details. Personally I HATE it when a commercially lined hood has the lining puff up when the hood is worn down because the lining was not secured to the hood anywhere except where the lining was seamed to the hood (around the face region). It BUGS me beyond belief. This cloak suffers from this problem. I fixed it by catch-stitching (by hand) the lining to the seam where the lining was sewn to the hood. Problem solved. And my catch-stitching was reasonably invisible.

The final finishing step for this cloak is to sew the lining to the cape ALL THE WAY AROUND. side edges and bottom edge. No way I'm gonna do that! Typically the cloak material and lining material are different fabrics which will stretch differently over time. Instead I hand-hemmed both lower edges, and when I sew the lining to the cloak, I will only sew at the neck edge and side edges. If you look really closely at the pattern envelope, view B (the only visibly lined cloak on the package) you can see that the lining is a bit bunchy at the lower edge. My modification avoids this problem!

The fabrics... I bought the cloak fabric on eBay. It's a wool from Austria which was listed as a
light weight olive wool. The price was decent, and in the color range I wanted (green/brown/gray) so I bought it. Then it arrived.... It's heavy, scratchy as hell, and more of a forest green than an olive green. And it's textured! It has short wool pieces sticking out like a corduroy fabric! There was no close-up shot for the fabric on eBay. Grr...
But after looking at it for several days, and observing how it would wear by looking at one of the more well worn edges, I decided it would age nicely so I went for it. And after draping it on myself I decided it had the right weight/drape to be a decent spring cloak. I have grown more and more fond of it as this project progressed, but I really cannot picture this as a suit wool, which is how it was marketed. Now about the itchyness. Wow. And I have I high tolerance for scratchy wool. So I decided it needed to be lined. Off I went to the department store in search of a coarsely woven historical looking fabric.

I found loads more linen than last year, at a cheaper price than I paid last year in nicer colors too! Grr! But still 10 euros (or 15 bucks) a meter is too much for a cloak that needs a heck of a lot of fabric. Cotton? As expensive as linen! I resorted to looking in the imitation linen section and came away with a polyester-rayon-linen blend for 4 euros (or 6 bucks) a meter. It looks and feels nice, dosen't have the wrinkliness of linen but still looks like it. Now I have one question for the fabric retailers here; who wants to purchase a dressmaking fabric that looks like linen, is coarse like linen, but is 100% polyester? I know I would sweat buckets in it! I am bummed by the lack of and high price of nice natural fiber fabrics here.

Now for the edging/trim. I have seen quite a few commercial cloaks out there with embroidered motifs on the hem and side edges... like these. They are gorgeous, and an awful lot of nice things can be done with embroidery... by anyone but me! I can't embroider well!
Instead I decided to needle-felt designs on the thing. Needle felting? I never needle felted before last weekend but it's very easy. Go ahead and google it. I made some templates of Celtic designs (the prominent side edge shown in the photo was sketched from the Book of Kells) by making a pencil drawing on graph paper (can't draw either), scribbling in the lines to be thicker, then cutting all the way around the design. I then laid the template on the fabric and gently shook baby powder over the template. I lifted it up, and the unpowdered areas were a transfer of the design. Then I took some unspun wool pulled out into long strips and plaved over the design. With a few stabs of my felting needle, the design was loosely secured, and with repeated stabs, well, you get what you see. Needle felting is easy and fast! If anyone wants more detail on this process, I will document the creation of the matching bag in detail later this week, but ya gotta ask! Now all I have to do is finish the edging and sew in the lining...

Ivanova

Sunday, March 16, 2008

I almost have a sleeve!


I'm within spitting distance of being done! This is a nice and easy mindless knit, and I think that it's even cuter than I imagined now that it looks less like a blanket and more like a garment.
I like the seamless design, though I'll have an awful lot of ends to sew in. Yuck! I'll take seaming over sewing in lots of ends any day of the week! I also made another change to the plan; I thought that the bobbles on this adult version of the pinwheel sweater were positively fetching so I added them around the circumference when I bound off. I swatched many different bobbles from my Harmony Guide (Aran and Fair Isle patterns) and I didn't like any of them. Instead I knit into the front, back, front of the next stitch, turned, purled 3 stitches, turned, slipped one, knit two together, passed slipped stitch over, then passed the previous stitch over to cast it off. I placed bobbles 7 stitches apart because 28 (the number of stitches in each wedge) is evenly divisible by 7. I'm also curious about how a picot edge will look, so I'm going to bind off the sleeves with a picot edge, instructions are here in Knitty. The winning finishing touch will make it onto my own version.

Sunday, March 09, 2008

Gloria/Pinwheel Hybrid

I spent my precious knitting time this week figuring out the construction of Hanne Falkenberg's Gloria, and swatching a kiddie-sized version of my own hybrid of the original I thought was absolutely stunning in Ribbels' window, and the very popular Pinwheel Sweaters for Women and Children by Shelley Mackie which is a free pattern from Elann. (To be honest I was kind of meh about the pinwheel until I saw this version. Wow.)
What I think I know about Gloria:
1. The upper back is not part of the circle. Evidence here.
2. Stitches are cast on, stitches at the bottom of the upper back are picked up, and more stitches are cast on. The resulting large number of stitches are knit back and forth in a texture pattern with increases placed at the armpit region (like on the Sunrise Circle Jacket by Kate Gilbert, available for free on the Knitting Daily Website). Evidence for these conclusions can be found here.
3. I think that the front and back shoulders are seamed together and stitches are picked up in the resulting holes for the sleeves. I also think that somehow stitches are picked up for the collar or the collar is sewn in place.
4. The texture pattern, oh the lovely texture pattern that plays off of differences in the shades in the yarns used. I looked at some swatches here(#1) and here(#2), and some of it is definitely garter stitch with two different colors that are swapped on each row. Like dark is knit on RS and light is knit on WS. There is another texture pattern at play here, as can be seen in swatch #2, but I don't know what it is, and I don't really care either. I think it's used on the collar because it dosen't look so bumpy as the 'wrong side' of garter stitch would. Or the majority of the sweater is knit in this texture except for the upper back. I don't care so much because I figured out enough to modify the pinwheel to my tastes.

All I did was work the pinwheel in garter stitch while alternating colors every row. Easy.
Now some people in internet-land say they prefer Gloria to traditional pinwheel sweaters
because of the better fit. I think that all that's needed to correct this issue is proper sleeve placement. I'm guessing for the kid version, because children grow and the the armholes will eventually be in the right place anyways. But for my version I will swatch and block, and determine armhole distance from my favourite t-shirts, and incorporate minimal ease into the placement.

First up: the yarns:
starting at the top, clockwise, we have Lang Yarns Soft Shetland color 09 (Purple Charcoal), color 08 (Wine) and some grey Frankengarn Naturstrickwolle in a slightly lighter grey than I'm
using for Trud. (I was thinking legwarmers at the time of purchase. Oh well...). Now for a rant about 'standards' for needle sizes. The Soft Shetland recommends a 5.5 mm needle for a yarn that weighs in at 284 yards/100g. This is lighter than worsted weight, using Cascade 220 as a benchmark for a worsted weight yarn (220 yards/100g). What big needles! Now the Frankengarn company recommends 3.5-4 mm needles for their stuff which weighs in at
218 yards/100g. I would call this a worsted weight, what tiny needles! These days I completely disregard manufacturer recommendations when choosing yarn and instead go with yardage/weight. Anyways, I'm completely digressing. I LOVE the Frankengarn, and while the Soft Shetland is pretty to look at and soft in the ball, I find it 'ropey' to knit with. And not so elastic. I hope it softens up with a wash. I figured it would be OK for baby/kid gear because it's a superwash wool.

Anyways, here's how far I've gotten.
I think it looks pretty good, and the interplay of color with garter stitch has given the desired effect. Not to mention that these random yarns I had sitting in the stash look Falkenberg-esque. I eliminated the yarn-over increases, and I didn't like the look of kfb increases on the Lara Pinwheel Jacket (similar pattern, same designer, also free on Elann.com)
so instead I opted for something more invisible: Elizabeth Zimmerman's 'Make 1' described on page 16 of Knitting Workshop. You basically drop a twisted loop of yarn on the needle and just keep on knitting. Easy, fast, not fussy, no gaping holes, no funny twists. And I'm switching the colored wools every 10 rows, but not the grey because I have ~ twice as much gray than the colors combined.

I like it.

Now imagine, as happy as I am with the 'right side' how surprised I was when I flipped the thing over and looked at the 'wrong side'.

Ignore the tails. You can see swirls of color where the increases were made, because they were not picked up from the grey row below. Now I like the 'wrong side' better than the 'right side'!
If I weave in the ends nicely, I'll have something the neither of the model patterns had: 100 %
reversibility!

Ivanova

Sunday, March 02, 2008

One month, two conferences, and two countries later...

I did a LOT of running around, and had nearly no time for knitting except on ridiculously long
train rides, but I managed to make decent progress on my cape. Here's the full-body-so-far shot:
I am using the vague-ish instructions from Barbara Walker's Knitting from the top.
The idea is that a cape/cloak is just a raglan that does not separate at the underarm for sleeves.
Simple enough, I wrote out instructions for a top-down raglan cloak that includes some cable panels from Elsebeth Lavold's Viking Patterns for Knitting on the front edges, (s-hitches from Arde, p. 73), raglan non-sleeve (wide panel with little lattice, p. 51), and the back (Vigdis pattern, p.81 over 24 stitches). Here's some detail shots of the cables in the order listed above.


I am finding that the Lamb's Pride Worsted has great stitch definition even though I am knitting at a ridiculously loose gauge in order to felt this sucker, so I feel confident that the
cables will survive the felting process. I never realized what a good-value cable-knitting yarn this was, and I'll probably use it again for sweaters. I just wish the mohair was less scratchy, but I can put up with a bit of scratch.

One good (or bad) thing about conferences is that the organizers tend to put random people of the same gender together in my hotel room. Imagine my surprise when I arrived in my hotel room in a tiny university town in the Netherlands to a pile of stuff on one bed including a pair of 3.5 mm straight needles with some fingering weight pink merino knitted into perfect teeny tiny stitches. A knitter! Of all the random conference attendees I was paired with, they put me up with another knitter. Needless to say, some yarn browsing took place in the 2 hours between the end of the conferences and catching our trains back. I finally saw some Hanne Falkenberg kits up close, and they are gorgeous! Too bad I can't justify spending 100 euros (about 150 dollars) on a kit. My favourites in the shop were Gloria shown in the colors I linked to, and Jazz. The pictures do not do the kits justice. But still, they are prohibitively expensive, so my new shopping buddy said I should take the mental picture for inspiration, and knit my own version with what I've got available.

I also had the good fortune of sharing a room with a knitter in Berlin, and we went to a yarn shop on Oranienstrasse (in the very cool Kreuzberg district) and I picked up a few balls of some no-name single ply lambswool in order to make my take on Gloria. On the overly long train ride from Berlin to Hannover (my roomie's transfer point) she taught me how to purl continental style. I was on a purl row. It took me 2 hours (!) to do one row. I guess I'll have to practice, and track her down for lessons on how to knit continental style. She watched me knit 'British-style' and shook her head and said "I just don't see how you can do that." Different strokes for different folks, I guess.

Here's a picture of my circular jacket yarns all nestled together:

I think it'll work (I hope!) and I'll cast on after I try a kiddie-version for the soon to be expected
cousin's kid. They are two different colors of no-name-provided German lambswool in an aran weight from somewhere near Hamburg (according to the shop employee) in a greyish lavender and petrol blue solid, paired with some Fleece Artist Kid Aran in the Marine colorway.
I'll be basing the construction on one of the 8-million free pinwheel jackets from the Elann website by Shelley Mackie but I may throw in a texture pattern like on Gloria. And I will make the sleeves striped. I particularly like this version of the pinwheel jacket, so I'll just let the ideas mingle until I have the time to cast on. I'll test texture patterns in my collection of purpley Soft Shetland balls and medium gray merino for the kiddie version.

Ivanova

Sunday, February 03, 2008

I "felt" like experimenting...

This week I decided to finally try felting. I am starting to plan my next vacation getaway to a medieval festival in May, and my husband commented that we would most likely by camping out. Probably in period gear. And if we don't camp out and get a hotel room, May is still kind of cold and damp! So I decided I needed a wool cloak. I started looking at general cloak designs, and there are some really nice LOTR inspired patterns available here. Hunt around the links, this site is a nice time suck if you're into that sort of thing. Unfortunately the wool fabrics available at the local department store fabric section kind of suck. And forget going to a fabric shop, there isn't one! (At least not a good one). And, sure, there's always Ebay, but I'd rather have something a little more inspired (and complicated) than a plain piece of gray wool draped from the shoulders with some sort of hood sewn in.

So I figured I'd felt my own after knitting it! Of course it will be cabled, so I wanted to see a) how a felted fabric looks in terms of stitch definition (and loss thereof) and b) how texture holds up to the felting process. I know it can be done nicely because I saw a felted cabled handbag pattern in the winter 2007 issue of Interweave Knits. Here's one example - very nice!

So I started with some DK merino (Frankengarn naturstrickwolle) and tried out the Dragon Scale pattern from Barbara Walker #2. I hand felted with hot soapy water and it turned into this:
Little to no stitch definition! And it's a nice stiff but light fabric, not too bad for a cloak.
I knitted it up on my Denise 11's (they're bigger than the standard US 11). I also hand-felted for about 20 minutes. For the inquiring minds, this yarn is a 2-ply. I heard somewhere that plied yarns felt cables better, but the down-side to using this stuff for the cloak is that I'd have to buy more yarn! You should have seen my husband's face when he heard this. He cringed! I guess the wool is sort of taking over our apartment. So I dug through my Christmas stash and unearthed the cones of Lamb's Pride Worsted in a dark green color. I certainly have enough of it!

I read on Knitter's Review that the ideal gauge for felting LPW is 3 sts/in. I get 3.8 sts/in on Denise 10 1/2's (smaller than standard) and 3 sts/in on Denise 11's (bigger than standard). So I knitted up a simple cabled close-loop and braid pattern (made up from my head) and hand felted both swatches. Here's the before and after pics.
This is the one done on Denise 10 1/2 needles. I only got about 15 % shrinkage in length after hand-felting and I felt it had not lost enough stitch definition. So I boiled it and agitated it in boiling water. Not a lick of difference was noticeable in size or loss of stitch definition. It fuzzed up a fair bit though. It's nice and thick, with a little bit of sproing left from the knitted fabric and the cables still show. Some dye was shed in the boiling process, but the vast color difference in the pics is due to the different lighting conditions. The top photo has the most accurate color, and the color shedding isn't noticeable in the boiled swatch.
This one was done on Denise 11's. The fabric was VERY loose before felting. I found it hard to keep the tension even when knitting the cables, so I got a hole (circled on the center picture) that didn't felt. I guess the Murphy's Law of felting is really true after all. I got 14 % length shrinkage with vigorous hand-felting, and it still retains stitch definition. I figure my best bet is to use the 10 1/2 needles because I get a nicer looking fabric in the end of it all.

So now for the pattern choices - I could not find any for a knitted felted cloak! There are a few knitted cloak patterns, and examples can be found by googling and surfing Ravelry. This one is nice, but it's from a Finnish book. The book is kindof expensive too. This one's okay, but not really what I had in mind. Now this one has the right shaping and would look reasonably historically accurate. I figured out by reading the blog of the flickr account I directed you towards that it is a raglan-shaped cloak, knit from the bottom up. So I popped out my Barbara Walker's Knitting from the Top and lo and behold there were vague-ish instructions for how to turn a top-down cardi into a cloak/cape. I've already picked out my Viking Cables (from Lavold's book) and I cast on already. I'll probably go to mid-calf, which should bring it to about knee length after blocking. I also need to figure out how to knit a hood...

Ivanova